📍 Local Guides: Solar Panel Installation in Austin, TX | Solar Panel Installation in Denver, CO | Solar Panel Installation in Tampa, FL | Solar Panel Installation in Raleigh, NC | Solar Panel Installation in Charlotte, NC | Solar Panel Installation in San Antonio, TX | Solar Panel Installation in Scottsdale, AZ | Solar Panel Installation in Nashville, TN | Solar Panel Installation in Orlando, FL | Solar Panel Installation in Portland, OR
What Solar Panel Installation Actually Involves
Solar panel installation is the most visible part of going solar, but it's actually one of the shortest phases of the entire project. A crew of 2–4 technicians can physically install a typical 8–10 kW residential system in 1–2 days. The 4–12 weeks most homeowners experience between contract signing and their system turning on is almost entirely consumed by the unsexy but essential work of permitting, utility interconnection applications, and final inspections.
Understanding each phase of the installation process — what happens, who does it, and what can cause delays — helps you set realistic expectations and gives you the knowledge to ask the right questions when evaluating installers.
The Complete Installation Timeline
| Phase | Duration | Who Handles It | What Can Delay It |
|---|---|---|---|
| Site assessment and design | 1–2 weeks | Installer | Complex roof layouts, shading analysis |
| Permit application | 1–6 weeks | Installer submits | Backlogged building departments |
| Utility interconnection application | 2–8 weeks | Installer submits | High-demand utility queues |
| Equipment ordering and delivery | 1–3 weeks | Installer | Panel/inverter supply constraints |
| Physical installation | 1–3 days | Installation crew | Weather, roof complexity |
| Municipal inspection | 1–2 weeks | City inspector | Inspector availability |
| Utility meter exchange/PTO | 1–3 weeks | Utility | Utility scheduling backlogs |
| Total: Contract to live system | 6–16 weeks |
Phase 1: Site Assessment and System Design
Before any equipment is ordered, a reputable installer performs a thorough site assessment. This involves analyzing satellite imagery of your roof (and often an in-person visit), pulling your 12-month electricity usage data from your utility, assessing shading from trees and adjacent structures using tools like Solar Pathfinder or Solmetric SunEye, and evaluating your electrical panel capacity.
The output of this assessment is a detailed system design: exact panel placement on your roof, string configuration for the inverter, conduit routing from roof to electrical panel, and a production estimate generated by modeling software (typically Aurora Solar or Helioscope, which use NREL weather data). This production estimate is the number your installer should stand behind — ask for it in kWh/year, not just savings in dollars.
Phase 2: Equipment — Panels, Inverters, and Racking
Your system design specifies the exact equipment to be installed. The three core components are panels, inverter(s), and racking:
| Component | Function | Common Options | Cost Share |
|---|---|---|---|
| Solar panels | Convert sunlight to DC electricity | Canadian Solar, Q CELLS, SunPower, REC, Jinko | 30–40% of total |
| String inverter | Converts DC to AC for home use | SMA, Fronius, SolarEdge (with optimizers) | 8–12% |
| Microinverters | Panel-level DC-to-AC conversion | Enphase IQ8, AP Systems | 12–18% |
| Roof racking | Mounts panels to roof structure | IronRidge, Unirac, SnapNrack | 5–8% |
| Wiring and conduit | Connects system components | MC4 cables, EMT/PVC conduit | 5–8% |
| Monitoring system | Tracks production in real time | Enphase Enlighten, SolarEdge app | 2–3% |
Phase 3: Permitting — What Homeowners Need to Know
Permits are the most common source of installation delays. Most jurisdictions require both a building permit (for structural work) and an electrical permit (for the DC and AC wiring). Your installer should handle all permit applications — if they ask you to obtain permits yourself, that's a red flag indicating inexperience with local permitting processes.
Permit timelines vary enormously: some cities process solar permits in 24–72 hours through online portals (San Jose, Tempe, Tucson have streamlined solar permitting). Others with backlogged building departments take 4–8 weeks for plan review. Ask your installer about permit timelines in your specific city before signing — in some markets, the permit wait time is the longest delay in the entire process.
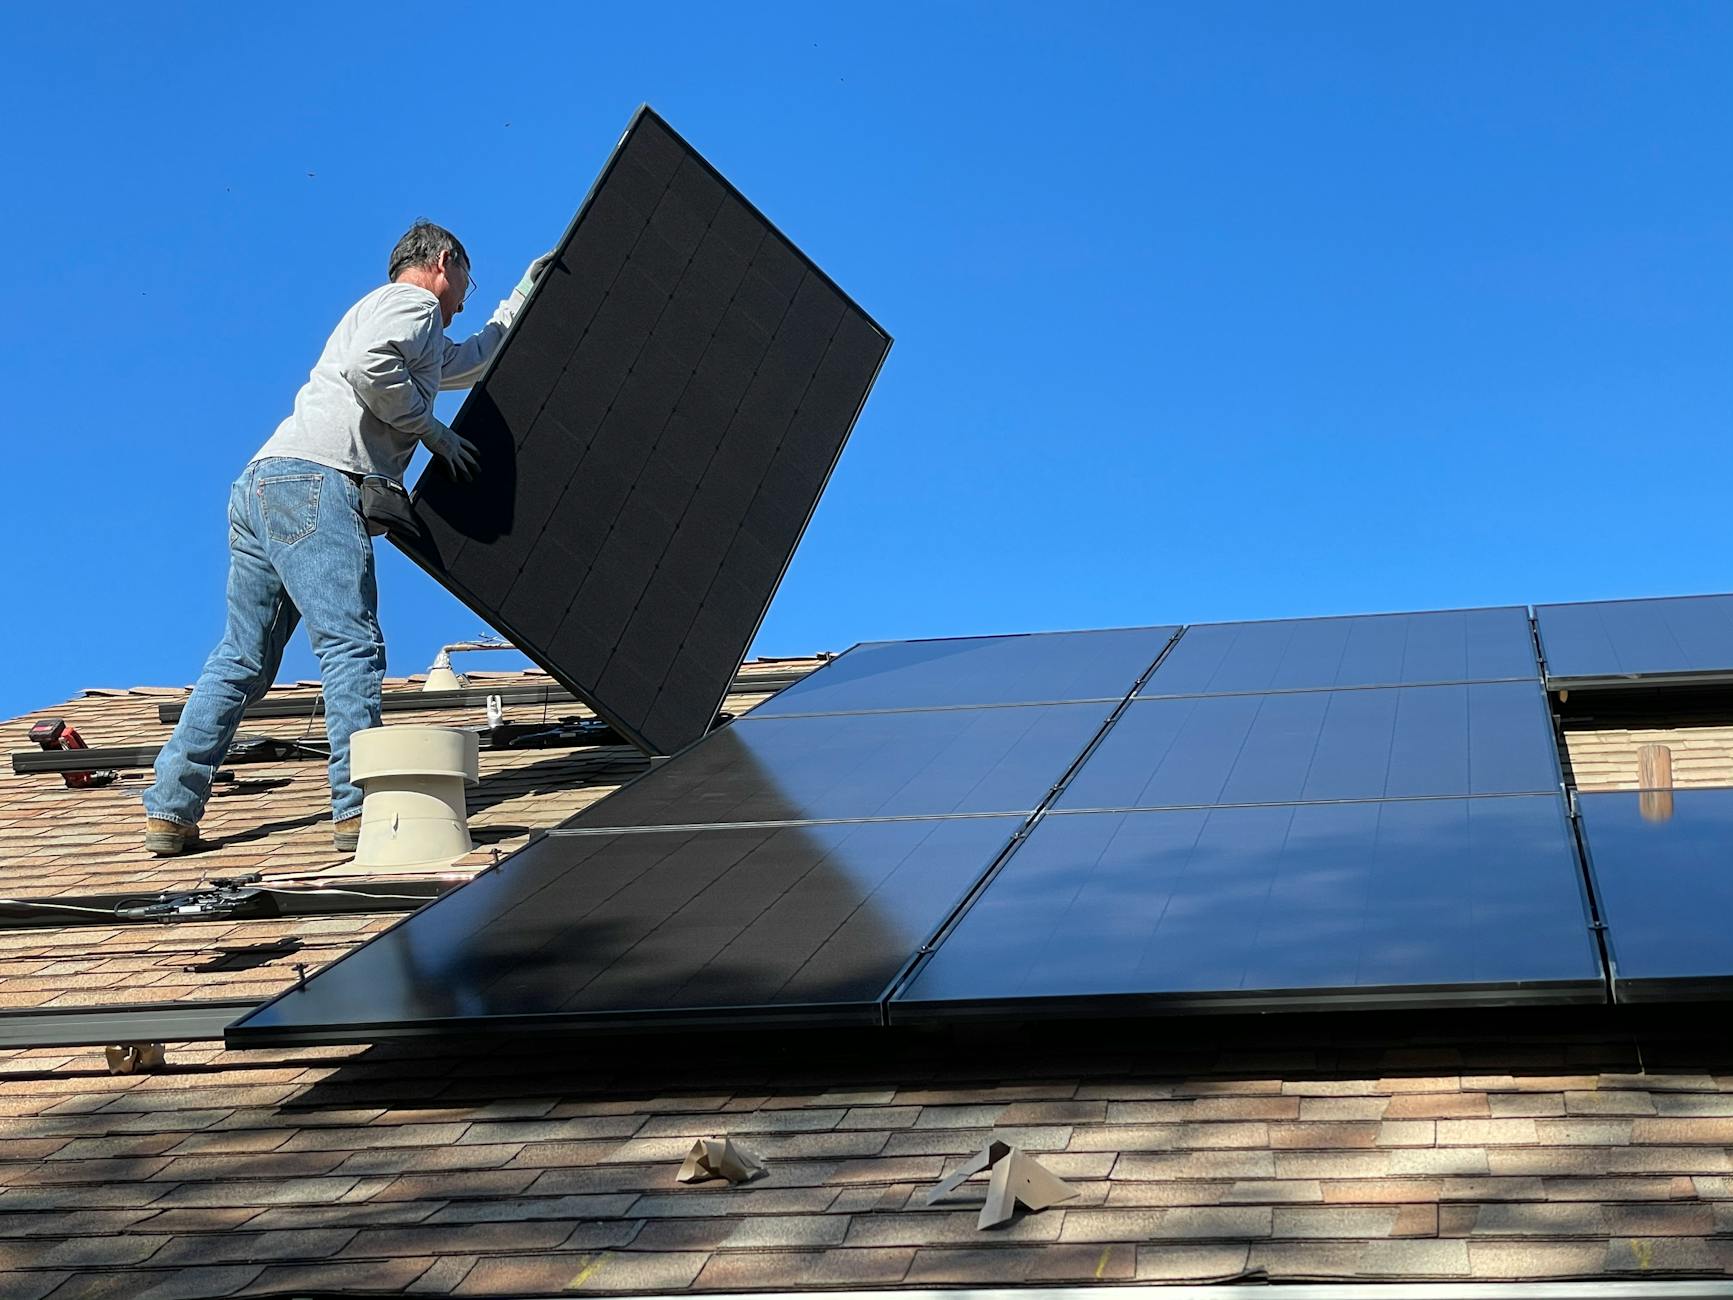
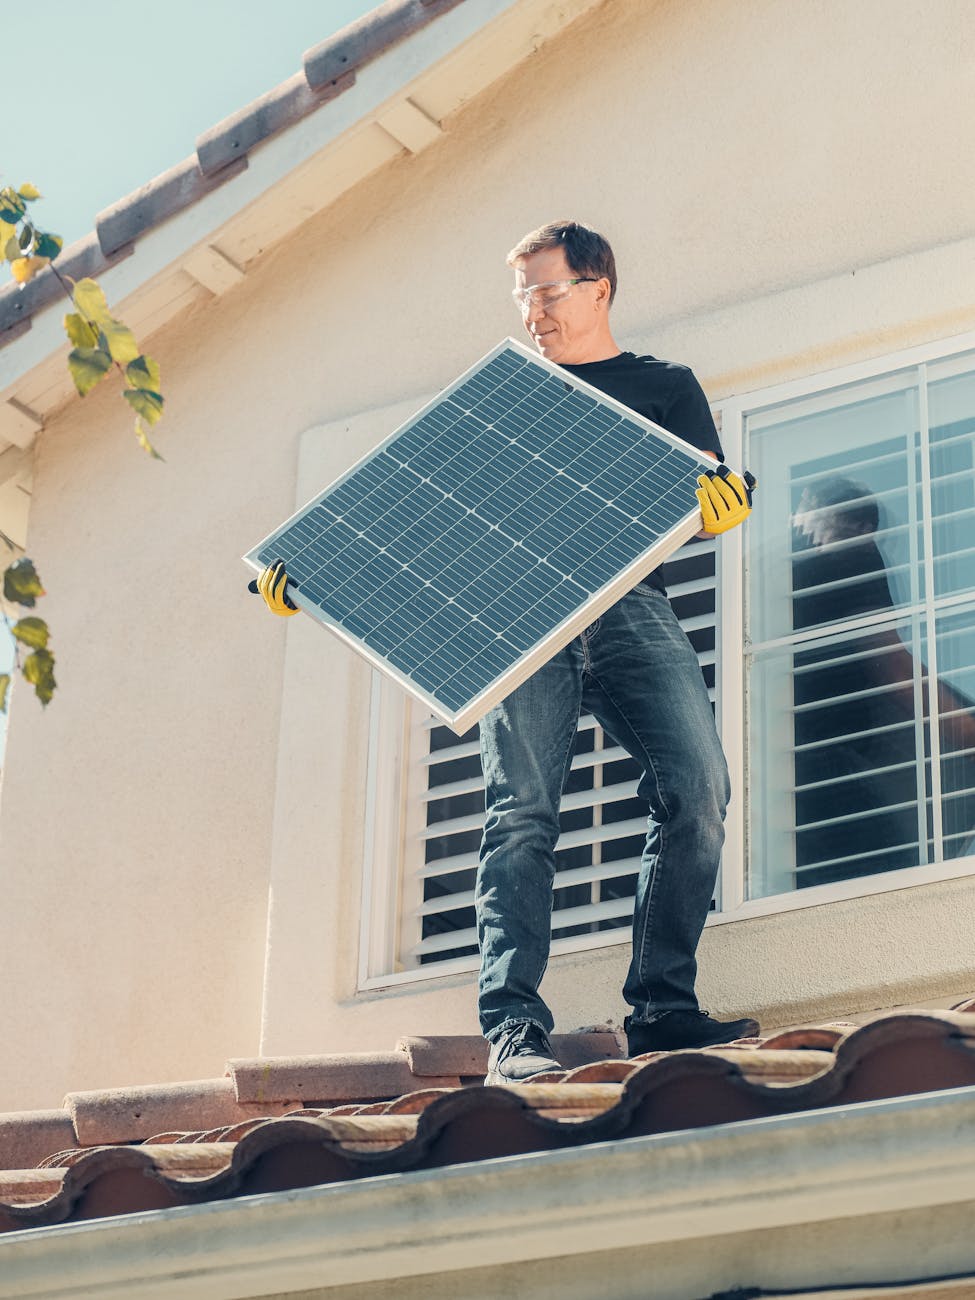
Phase 4: Installation Day — What the Crew Does
Installation day begins with the crew assessing weather conditions and staging equipment. The sequence of work:
- Roof preparation: Locate rafters, mark panel positions, install flashed roof attachments (lag bolts with EPDM weatherproof flashing)
- Racking installation: Attach rails to roof attachments, level and align, install grounding
- Panel placement: Slide panels onto rails, secure with end clamps and mid clamps
- Electrical wiring: Connect panel MC4 connectors in string configurations, run DC conduit from roof to inverter location
- Inverter installation: Mount inverter (typically in garage or utility area), make DC and AC connections
- AC connection: Run conduit from inverter to electrical panel, install dedicated solar circuit breaker
- System testing: Verify all connections, test inverter startup, confirm monitoring communications
- Cleanup and walkthrough: Remove all debris, walk homeowner through system and monitoring app
Phase 5: Inspection and Permission to Operate
After installation, two approvals are required before your system can operate: a municipal inspector must review the work against your permit plans, and your utility must authorize grid interconnection. These happen in sequence — utility won't authorize until inspection passes.
The municipal inspection typically takes 30–90 minutes. The inspector checks structural connections, wiring methods, conduit runs, panel labeling, and electrical connections at the panel. Well-installed systems pass on the first inspection; systems with wiring violations or missing labels may require corrections and a re-inspection, adding 1–2 weeks.
After inspection approval, your installer submits the signed inspection card to the utility. The utility schedules a meter exchange (replacing your standard meter with a bidirectional net metering meter) and issues Permission to Operate (PTO). You'll receive PTO in writing — this is the document that officially authorizes you to turn on your system.
Cost Breakdown: What You're Paying For
| Cost Component | Typical Range | % of Total |
|---|---|---|
| Solar panels (equipment) | $7,000–$12,000 | 32–40% |
| Inverter(s) | $1,500–$4,000 | 7–12% |
| Racking and hardware | $1,000–$2,500 | 5–8% |
| Electrical components | $800–$2,000 | 4–7% |
| Labor (installation) | $2,500–$6,000 | 12–20% |
| Permitting and inspection fees | $300–$1,500 | 1–5% |
| Utility interconnection fee | $100–$500 | 0.5–2% |
| Installer overhead and margin | $2,000–$5,000 | 10–18% |
| Total (8–10 kW system) | $20,000–$28,000 |
Choosing the Right Installer: 8 Non-Negotiable Criteria
The installer you choose matters more than the panel brand. A mediocre installation of premium panels underperforms a quality installation of mid-tier panels every time. Here are the criteria that separate excellent from acceptable:
- NABCEP Certification: The North American Board of Certified Energy Practitioners certification is the solar industry's gold standard. Require at least one NABCEP-certified installer on the project crew.
- State contractor's license: Verify the installer holds a valid state contractor's license covering electrical and/or roofing work, depending on scope. Check your state's contractor licensing database — takes 2 minutes.
- Workers' comp and liability insurance: Request certificates. If a crew member is injured on your roof without insurance, you may be liable as the property owner.
- 5+ years local experience: National companies with local franchises are not the same as locally-established companies. Local experience means knowledge of your specific utility's interconnection process and your building department's quirks.
- 10-year workmanship warranty minimum: The warranty on the installation itself (not just the equipment). This covers roof leaks from mounting penetrations and electrical failures from wiring defects.
- Detailed written quote: Line-itemed breakdown of equipment and labor. Any installer who gives only a total price without itemization is a red flag.
- Production guarantee: A commitment to produce a minimum kWh/year with defined remedies if they miss. Strong installers offer this; weak ones avoid commitment to actual performance.
- Verifiable local references: Ask for 3 customer references from the past 18 months in your area that you actually contact by phone.
Post-Installation: Monitoring and Maintenance
After your system is live, the ongoing engagement is minimal but important. Set up your monitoring app (Enphase Enlighten, SolarEdge mySolarEdge, or your inverter's platform) and establish a baseline for normal daily production on clear days. Review your monthly utility bill to confirm net metering credits are appearing correctly.
Annual maintenance checklist: visual inspection of panels for damage or debris, check monitoring data for any underperforming strings or panels, inspect conduit and wiring for physical damage, clear any vegetation that has grown to shade panels, and verify inverter cooling vents are clear. Every 3–5 years, a professional inspection of mounting hardware torque and electrical connections is worthwhile.
Solar Market Outlook and What It Means for Buyers in 2026
The residential solar market in 2026 reflects an industry that has matured from early adopter niche to mainstream home improvement. With over 4 million US homes powered by rooftop solar and annual installation volumes exceeding 8 GW, the competitive installer landscape now firmly benefits buyers. More contractors mean more competitive pricing, more financing options, and better-informed consumers than at any point in the industry's 30-year history.
Panel technology in 2026 is dominated by TOPCon (Tunnel Oxide Passivated Contact) monocrystalline cells achieving 21–23% efficiency at mainstream prices, gradually replacing PERC panels that dominated 2018–2024. Heterojunction (HJT) cells from SunPower, REC, and Panasonic reach 23–24% at a 15–20% price premium — appropriate for space-constrained installations. For most homeowners with adequate south-facing roof area, the sweet spot remains mid-range PERC/TOPCon panels at 400–430W per panel from tier-1 manufacturers.
Battery storage attachment rates are rising sharply. Over 40% of new California installations now include storage, driven by NEM 3.0's incentive for self-consumption. Nationally, 20–25% of new residential solar includes batteries — up from under 10% in 2021. Falling battery prices ($600–$800/kWh of capacity before incentives) and the extension of the 30% ITC to standalone batteries have been the key drivers of this acceleration.
How to Verify a Solar Quote Is Fair
One of the most valuable things a solar buyer can do is independently verify that the production estimates and pricing in their quote are reasonable before signing. Three resources make this easy:
NREL PVWatts Calculator (pvwatts.nrel.gov): Enter your address, system size, panel tilt, and orientation. PVWatts uses NREL's solar irradiance database to calculate expected annual output in kWh. Compare this against your installer's production estimate — they should be within 5–10% of each other. A dramatically higher estimate than PVWatts suggests the installer is using optimistic assumptions to make the financial case look better than reality.
EnergySage Price Index: EnergySage tracks actual solar pricing from quotes submitted through their marketplace and publishes quarterly benchmarks by state. The national average in Q4 2025 was $2.85/W gross installed. Your quote should be within 20–25% of your state's benchmark without strong justification. Use this as a floor for negotiation — if your quote is 30%+ above benchmark, present the data and ask the installer to explain the difference.
DSIRE Incentive Database (dsireusa.org): The Database of State Incentives for Renewables and Efficiency lists every current state, utility, and local incentive program in the US. Before your first installer meeting, spend 15 minutes on DSIRE to understand exactly what incentives you qualify for. Installers who mention fewer incentives than DSIRE lists may not be up to date — or may be strategically underselling your options.
Understanding Your Solar Contract Before You Sign
Solar contracts are legally binding documents that commit you to significant financial obligations. Key things to verify before signing:
- System specifications: Exact panel make and model, inverter type and model, system size in kW-DC and kW-AC, expected annual production in kWh. Vague descriptions like "premium panels" or "high-efficiency inverter" without specific model numbers are a red flag.
- Pricing and payment schedule: Total contract price, deposit amount, payment milestones, and final payment trigger. Avoid contracts requiring more than 10–15% upfront before permits are pulled.
- Timeline commitments: Expected install date range and what happens if the installer misses it. The best contracts include remedies for significant delays.
- Warranty terms: Panel product warranty duration, panel performance warranty (80% at year 25 minimum), inverter warranty, and workmanship warranty. All should be specified by duration and what's covered.
- Permit responsibility: Confirm the installer handles all permit applications and utility interconnection filing. You should not be required to obtain permits yourself.
- Production guarantee: If offered, verify the specific kWh/year guaranteed, how underperformance is measured, and what remedy the installer provides (additional panels, credit, refund).
- Cancellation terms: Most states provide a 3-day right of rescission for in-home sales. Understand what cancellation fees apply after that window and at what project milestones.